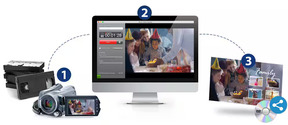
Converting tapes, film is the best way to preserve memories for your family
Article content
Memories can last forever but not the medium they’re stored on.
Advertisement 2
Story continues below
Article content
Article content
Article content
Videotapes can hold your precious home movies for several years if they’re kept in a cool and dry environment. But eventually these formats deteriorate, making the tapes unwatchable.
Adding to the problem: You may not be able to play back these captured moments if you don’t have a working machine. So, now is the time to digitize your dusty collection of tapes.
Digitizing your old photos and home movies – and storing them in a safe place – can also safeguard them from damage, such as the devastating wildfires raging through parts of Southern California that have already destroyed more than 12,500 homes.
The good news is that preserving these memories is not as daunting as you might think. You can do the conversion yourself or you can use a service to digitize the various formats you have stored: 8mm or 16mm film reels; super 8 and H8 movie film; MiniDV cassettes; and Betacam, Betamax and VHS tapes.
Advertisement 3
Story continues below
Article content
Pro tip: If you’re dealing with very old or fragile film, allow a professional to digitize it (see option No. 5). Even if you still have the machine to play it on as part of the conversion process, you risk damaging these memories.
Before we look at how to digitize your home movies, keep in mind preserving your family events isn’t just for your enjoyment – it’s for future generations, too. We’re not going to live forever, despite what the Oasis song says. Once your movies are on a computer or cloud site, they can be viewed long after you’re gone.
Recommended from Editorial
How to digitize your home movies
Article content
Advertisement 4
Story continues below
Article content
The first step is to find all your shoeboxes of tapes. Don’t worry if they’re not labeled with dates, events or people involved. Once they’re converted, you can preview the files to properly name them.
The important thing is to do this sooner rather than later. Then you can organize them effectively.
And you have options:
1. Connect to a computer
If you still have a working VCR or camcorder, you can connect it to your computer using a “middleman” gadget. They’re often called a “video capture card” or analog video-capture device, and you plug them into the back of your playback machine.
RCA cables – yes, the company you grew up with invented these connectors – are often included: yellow for video, and red and white for left and right audio. The other end of this gadget has a USB connector you plug into your PC or Mac. Some also have an HDMI cable that plugs into modern TVs, but they are only ideal for viewing and not digitizing.
Advertisement 5
Story continues below
Article content
These products can cost as little as $14 on Amazon.ca, though more premium offerings with extra conversion features may be closer to $50. If these products don’t come with software to record the video on your computer, you’ll need to download an application on your own (try HandBrake, which is free).

2. Record directly onto memory cards
If you don’t own a computer or prefer to bypass the computer directly, there are gizmos that plug into the back of your H8, MiniDV camcorder, VCR or Betamax machine. That way you can record directly onto a flash storage device, such as an SD memory card or a USB stick.
Products such the Hi8 VHS VCR to Digital Converter ($115) do the trick, or for $100 more you can also view what you’re digitizing on a small screen, with a product like the Unisheen Universal VHS to Digital Converter ($230). You’ll need to pick up SD memory cards or USB drives on your own, but they’re relatively affordable.
Advertisement 6
Story continues below
Article content
Once your home movies are stored on flash drives, you can insert them into a computer to view and copy them onto an external hard drive. Many TVs have a USB port, so you may be able to watch them on a big screen.

3. Use a DVD recorder
While not as popular as a few years ago, “ripping” your old tapes onto recordable DVDs is still a viable option. As long as you have a DVD or Blu-ray player, a computer with a DVD drive, or a video game console such as one in the PlayStation or Xbox family, you can watch DVDs packed with your memories.
Along with a DVD recorder or a DVD recorder drive on your computer, you’ll need to pick up some blank DVDs. Because DVD recorders can be tougher to find these days, you might consider buying a used one on Kijiji, Facebook Marketplace, Craigslist, eBay, or Nextdoor. Remember to review the seller’s rating or reputation before you buy.
Advertisement 7
Story continues below
Article content
The process will involve connecting your old machine, such as a VCR or camcorder, to the input of the DVD recorder.

4. Record from screen
Another way to digitize an old home movie is to play it back on a projector or television and record it on your phone, though the quality won’t be anywhere as good as with the previous methods.
But making a recording of a recording is better than keeping your old movies trapped in an outdated medium. And it might be ideal for those who don’t have the time, money or know-how to record to a computer, DVD or portable storage.
If this is how you want to rerecord your footage, dim the lights and turn up the audio (if your original has any). Instead of holding your phone while recording, stabilize it on a coffee table or a stack of books. Or you can buy or borrow a tripod that holds your phone steady.
Advertisement 8
Story continues below
Article content
Once the video is on your phone, you can upload it to a cloud site, copy it to a computer and view it whenever you like.
RECOMMENDED VIDEO
5. Hire a service
Most major cities have services that can do all this for you, be it individuals, photo and video stores, or specific departments at big box stores (though it’s more difficult to find these services these days).
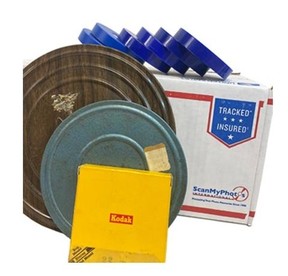
To keep the home movies in Canada, consider HomeMovies.ca (ask for Steve Hartwell), or send your tapes and reels to ScanMyPhotos in the U.S. (ask for Mitch Goldstone), and these places can also digitize your photographs, negatives and slides.
Before you choose a local or national service, compare prices, read reviews and discuss turnaround time.
– Marc Saltzman is the host of the Tech It Out podcast and the author of the book, Apple Vision Pro For Dummies (Wiley)
Article content
This post was originally published on here


Comments